Category Management:
You have four options:
Change an existing category
Add a new category
Remove a category
Print Category List (Generate Report)
.png)
Change category:
To change a category, highlight the category and press "Change Category" under the Actions column (the icon with the paper and pencil). In changing a category, you will be able to edit the category Name, Description and For. Note: you cannot change the category Type
.png)
Add Category:
To add a new category, select "Add New Category". You will then enter the category name, description, type, and For.
Administration – Belongs to the Unit
Fundraiser - Is part of a Fundraiser (Specific Fundraiser will need to be identified)
Program - Is part of a Program (Specific Program will need to be identified)
Non Unit - Pass Through
Note: You can also add new categories while writing Checks, Receipts and Balance adjustments. Simply type in the name of the new account and follow the prompts to add the new category.
.png)
Remove Category:
To remove a category, highlight it and select the trash can under the Actions column. Then select "Yes" on the dialog box.
Note: You cannot remove a category if it has had transactions posted to it, but you can make them inactive.
.png)
Inactivate a Category:
Highlight the Category you wish to make "Inactive" and select the change icon under the Actions column (the icon with a pencil and paper). On the bottom left of the box that appears, un-check the "Active?" box and click Save.
.png)
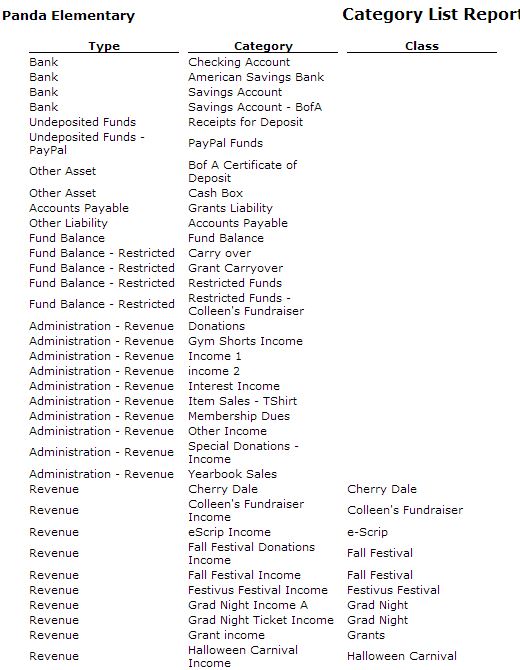
Print Category List:
Select "Generate Report" to print your Category List.
.png)
*Note: your printed Category List will show you each category Type, Category Name and what Fundraiser/Program the category is associated to (Class)
Copyright © 2010-2015 BoosterFinance™