Welcome To Booster Finance! To get started follow these simple instructions
For Booster Finance Setup video tutorial, click here
The Initial Setup process will allow you to establish the opening date and reporting period(s) for your accounting books and provide the current balances for your chart of accounts. To begin, follow the on screen instructions. Note: If at any time you need more information, please see the blue "Help?" button at the bottom left of each screen.
Make sure ALL of the information in each step is correct as it is NOT possible repeat the setup process
Enter in the Unit Information, which includes Unit Name, Address, City, State, and Zip code

Begin by entering in the Fiscal Year Start Month. The Fiscal year is the period over which you track your finances. Next, enter in the Tax Year Start Month. The tax year is the period over which you file your taxes. Now enter in the Opening date of your books. This is the day on which your accounting books will be opened. Note: You cannot enter any transactions prior to the opening date of your account books.
BE SURE TO VERIFY YOUR TAX YEAR START MONTH AND YOUR FISCAL YEAR START MONTH BEFORE CONTINUING THE SETUP PROCESS
It is now time to set up your bank accounts. Here is where you will create ANY bank account you have, as of your Opening Date that has a balance in it. There are a few things you will need for this part of the setup:
The latest bank statement prior to the opening date (for each account)
Any outstanding checks and deposits as of the opening date (for each account)
When you add the bank account you will be asked to provide:
Account Name
The last statement date and statement balance
Note: You must provide the information on the primary checking account before continuing to the next page
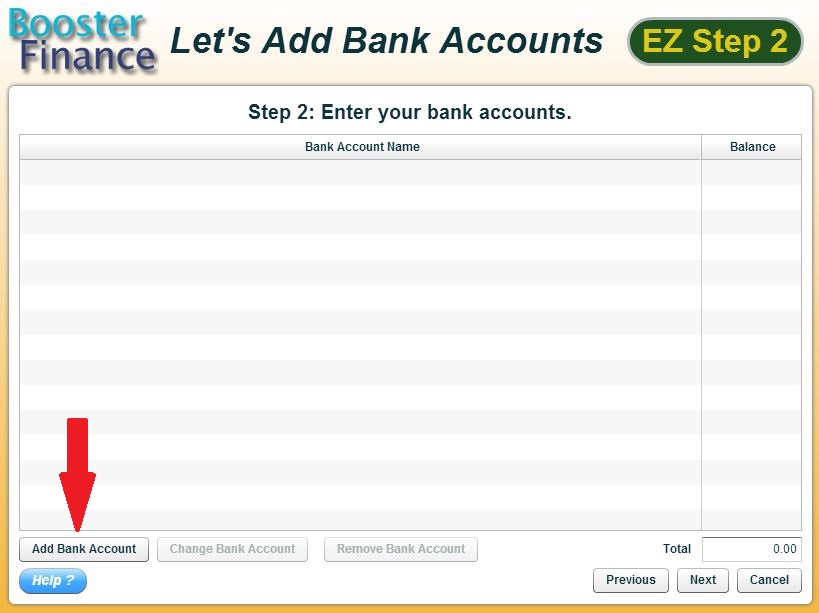
Select “Add Bank Account” button Note: It is important to “go green”, as in your totals should reconcile. This ensures you have included all outstanding transactions in your opening balance.
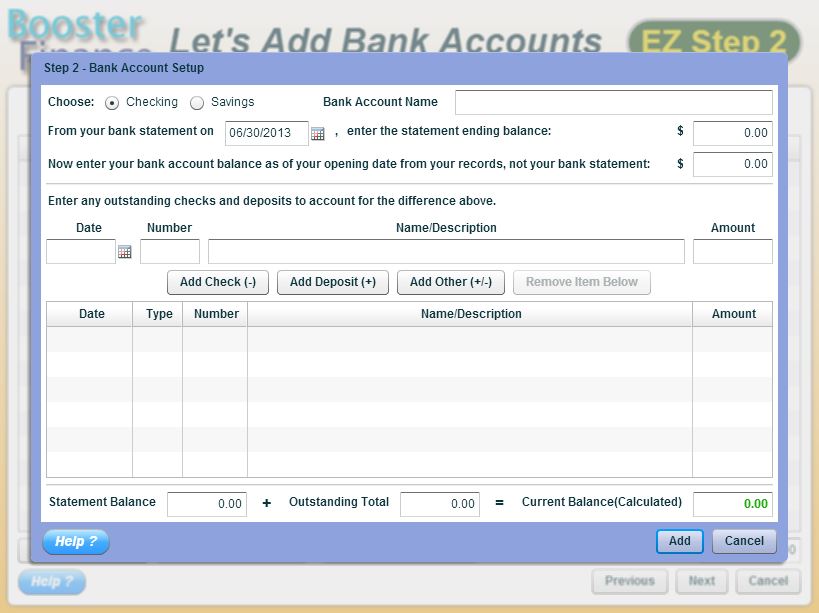
1.Enter the Bank Account Name
2.Enter in the last statement date and statement ending balance Note: This date will auto populate to the day before your Opening Date as specified in Step 1.
3.Now enter your bank account balance as of your opening date from your records, NOT your bank statement
4.Add any outstanding checks and deposits by filling out the Date/Number/Name/Description portion and selecting either "Add Check" or "Add Deposit" Note: You can still complete setup without a balanced total – at your discretion (a red Current Balance figure) by using the “Add Other (+/-)” button. When using “Add Other (+/-)” you will need to specify a negative amount with a (-) in front of the entered number.
a.Select the “Import” button
b.Files to be imported will need to be in a .cvs file with the specific column headers as shown below
.jpg)
a.Choose your file and “Start Import”
1.Once your Current Balance is “green” you may select “Add”
2.Repeat process for any other Checking or Savings account you currently have.
3.Select “Next” to continue
Now it is time to setup your Fundraisers and Programs. Setting up your Fundraisers and Program will create ONE income and ONE Expense Account for each Fundraiser or Program you add (in Setup Step 3b on the next page).
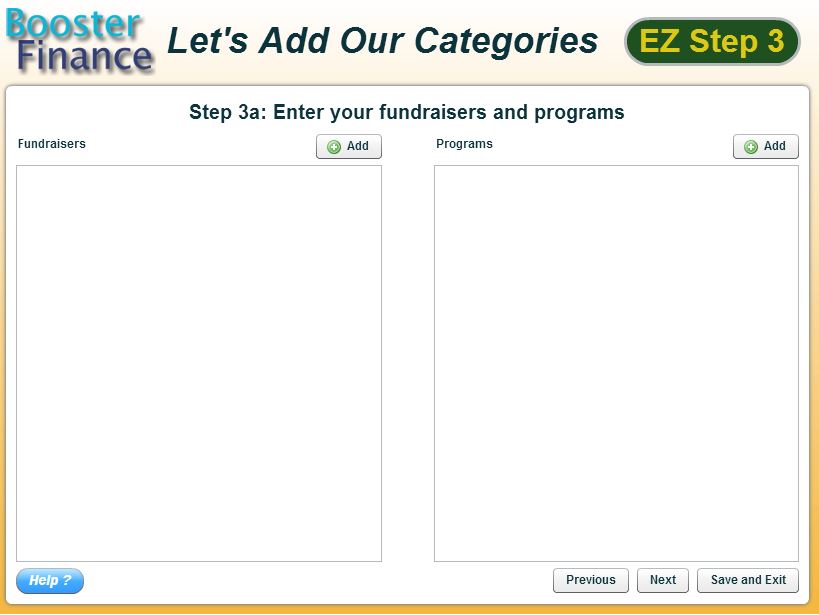
To add Fundraisers or Programs click on the “Add” button next to either box:
.jpg)
.jpg)
.jpg)
Enter the Name of the Fundraiser or Program (Required)
Enter the Date Range and Any Notes (Optional)
Select the “Add” button
The new Fundraisers and Programs have been added to their respective boxes:
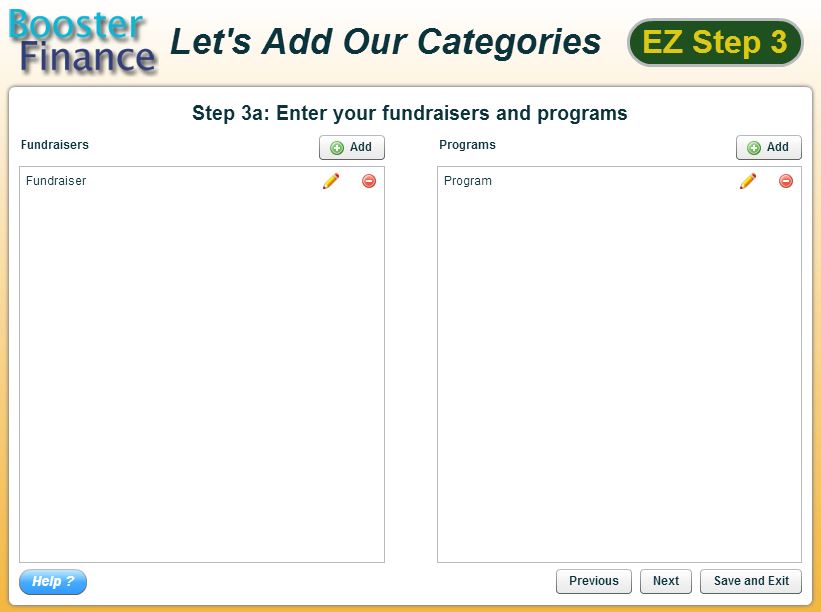
Repeat these steps for each of your Fundraisers/Programs. All of your Fundraisers and Programs must be entered in during this step.
To edit a Fundraiser/Program already entered, select the “Pencil” icon next to the name of the Fundraiser/Program. Edit the information need and select the “Change” button:
.jpg)
To Remove a Fundraiser/Program select the Red Circle with the minus (-) sign in it: This will ask you if you would like to remove Just the Fundraiser/Program, Remove Both (the Fundraiser/Program and the Categories that have been created for you on the next screen) or Cancel:
.jpg)
Once you have entered all of your Fundraisers and Programs select the “Next” button at the bottom of the Page.
Booster Finance pre-loads certain categories for you as well as created ONE income and ONE expense category for each of the Fundraiser/Programs you entered in the previous step. You have the ability to Remove any of these categories that you do not need, or edit them:
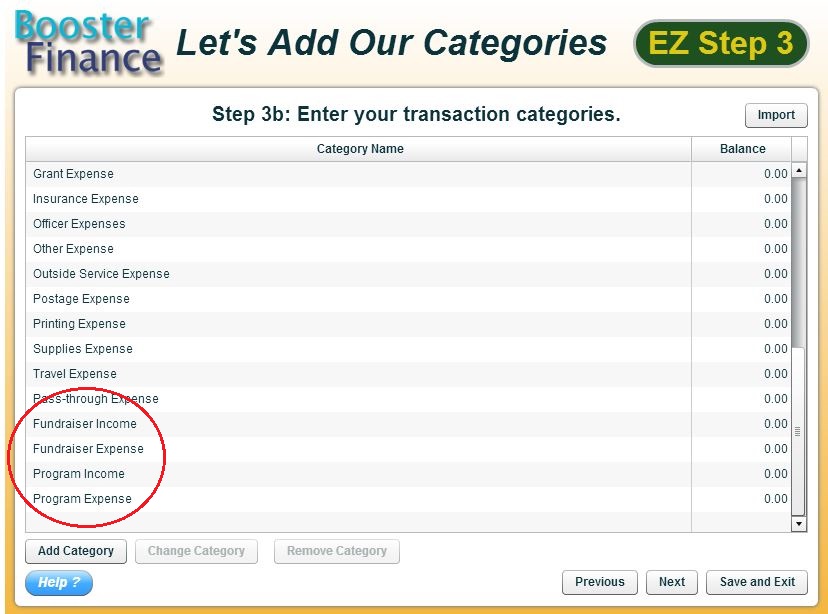
It is now time to set up your Transaction Categories. You will need your most current Chart of Accounts for this step:
.jpg)
New: You can now import a .cvs file of your transactions categories by selecting the “Import” button on this screen. Column Headers must match those shown below:
.jpg)
NOTE: For any Fundraiser or Program Categories you have imported you will need to associate the category to the specific Fundraiser/Program. To do this you will double click on each category and change the “For” from Administration to Fundraiser/Program and identify the appropriate Fundraiser/Program. If necessary, you will need to add the Fundraiser/Program and the system will prompt you to do so. See below for more information.
You can also add your categories manually:
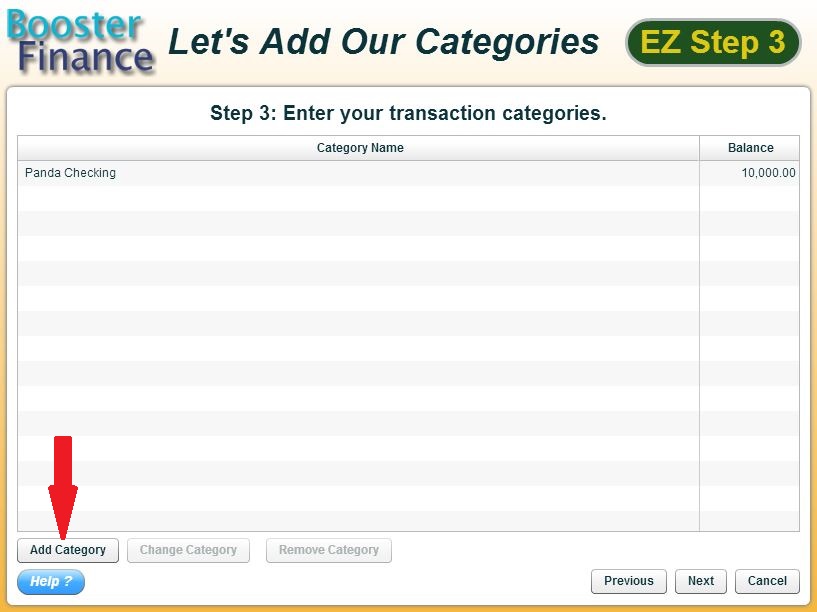
Select “Add Category” button
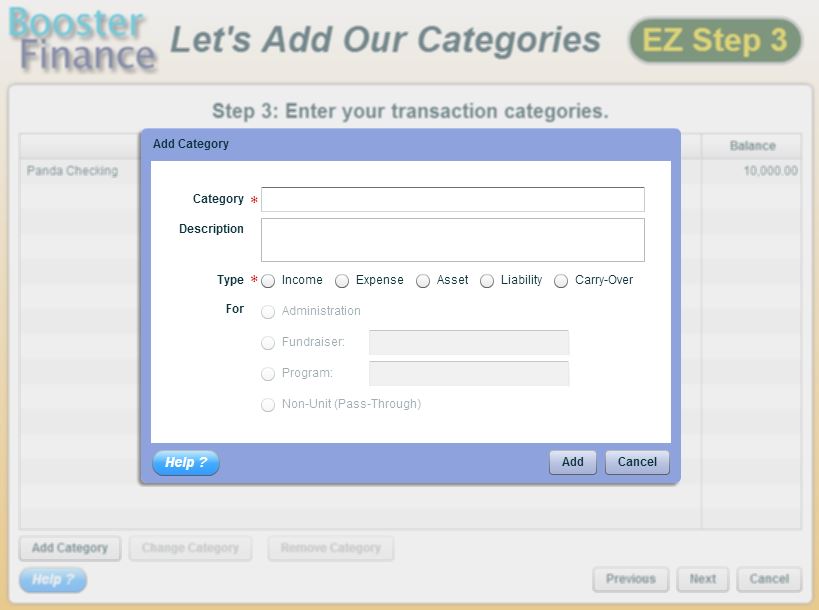
Administration – Belongs to the Unit
Fundraiser - Is part of a Fundraiser (Specific Fundraiser will need to be identified)
Program - Is part of a Program (Specific Program will need to be identified)
Non Unit - Pass Through
1.Starting from the top of your budget “Chart of Accounts”, add your revenue, expense, asset, liability or carry-over categories.
2.For Income and Expense categories, you’ll state whether these are tied to a Fundraiser or Program, or otherwise. Note: This association will remain with each category for transactions recording. Each recorded transaction will populate your activity reports.
3.Once all required fields are completed for this Transaction Category select “Add” to add the category.
4.Repeat this process for all of your Transaction Categories listed in your Chart of Accounts.
5.Select “Next” after all your categories have been entered. Note: It will be possible to add categories after setup is complete.
Note: Select the blue “Help?” button for a list of recommended Transaction Categories
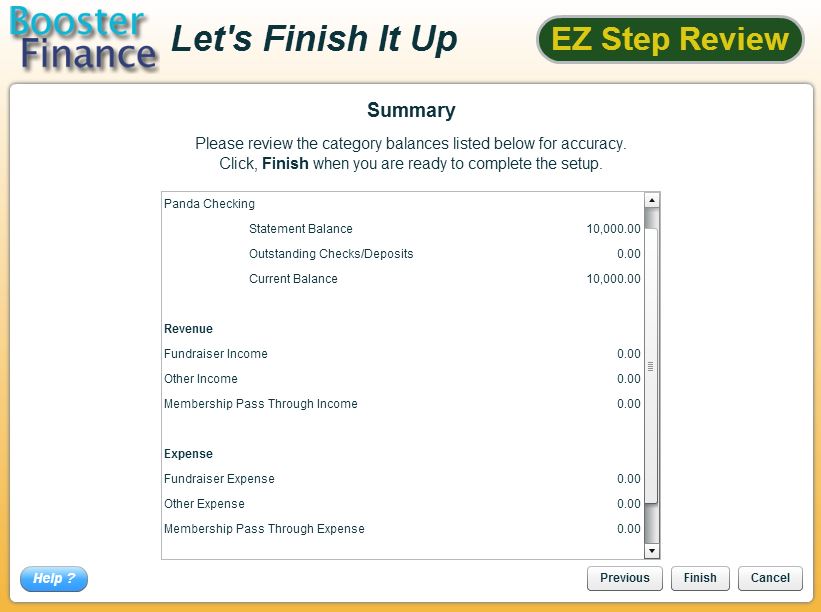
If your dates do not “align”, you will need to add total balances for your bank account and categories as of the dates indicated on the screen. If you require assistance with this portion, please contact our customer support line BEFORE completing setup.
Congratulations! You have finished the initial setup process. Before selecting "Finish" please review all of your categories and fund balances to make sure they are accurate. Note: You may not restart this process after it is completed.
Copyright © 2010-2015 BoosterFinance™