Web Store:
For Webstore and PayPal/PayPros video tutorial help, click here
Webstore Admin
.png)
1.Select your Payment Processor. *Note: Processors must be setup first in Admin>Our School
2.Check Store is Active when you are ready to start using your webstore
3.Allow Back Orders – when checked this will allow to sell below inventory on the Webstore. This applies to ALL inventory tracked items
4.Choose a Domain Name. This will create the link that you can embed on the School’s/District’s web page or email out to students/parents. Domain names should not include Capital letters or spaces.
5.Copy your webstore link to embed or paste in an email
6.Enter Convenience Fee amount. This is the amount that the purchaser will be charged for purchasing through the your webstore. Leave at 0 to not charge a fee
7.Design Store – Allows for customization of your webstore
8.Save Changes – Make sure to save changes, even after designing store
.png)
Design Store
1.Enter an Announcement
2.Click in each color box to change the colors of your webstore
3.Select OK when finished (be sure to also “Save Changes”
*Note: Add images to your items from Admin>Item Admin. Change the item, select the Manage Image button, upload new image:
.png)
Adding Items to Store
.png)
.png)
1.Select the Items tab
2.Click the arrow next to the items to move them to and from the Available Products/Webstore Items
3.Select the Featured Items section
4.Click the arrow next to the items to move the items in Webstore to the Featured Item box. Featured Items show on the Front page of your webstore
5.Save Changes
Policies
.png)
Load default policies or manually type them.
Registering for a Webstore account:
Some items require the purchaser to register for, or login into their Webstore Account. To register for a Webstore account:
1.Select the “My Account” button from the webstore.
.jpg)
1.Enter in your existing Username (email) and password or
.jpg)
1.Select “Register for an account”
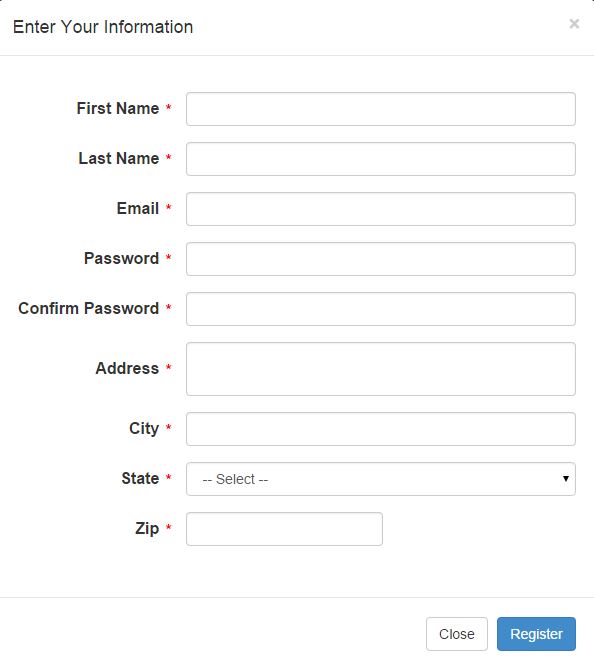
1.Enter all of the required information
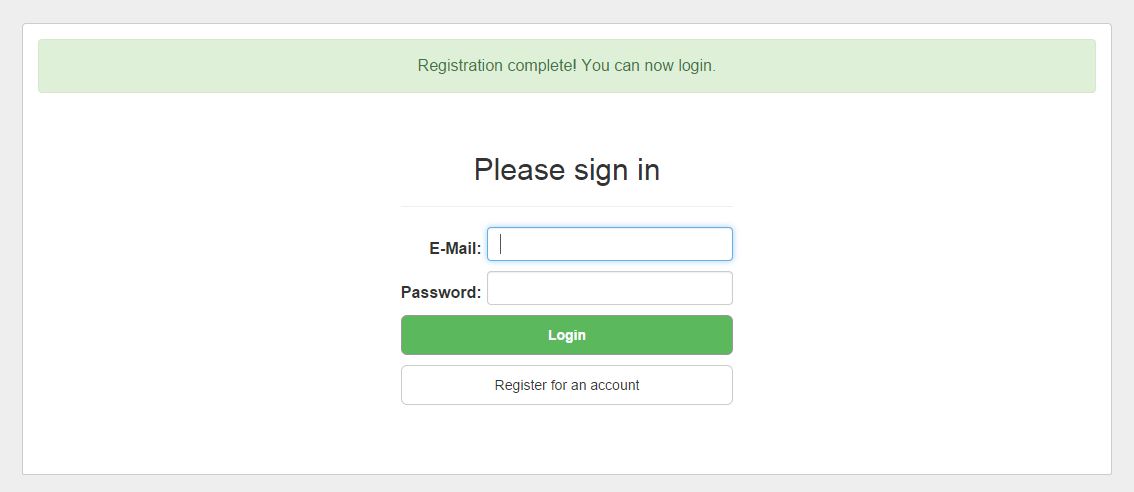
2.Select “Register”
3.You will receive an email to the email address provided

1.Click on the link provided in the email
My Account:
Once you have received your username and password you can login into your account.
1.Select “My Account”
2.Enter your Username and Password
3.Select “Login”
Within “My Account” you can:
Update your Profile:
.jpg)
Add Family Members:
.jpg)
To add/remove Family Members:
1.Select “Add Family”
2.Search for existing family members in the system by their Email Address and First and Last Name
.jpg)
1.Or Add a new family member
.jpg)
1.All family members you have listed will show under the “My Family” section of “My Account”.
.jpg)
1.To remove a Family member, select the red “X” next to their name.
.jpg)
View Past Order History:
.jpg)
Change your existing password:
.jpg)
New Membership Directory will include all family members associated to Members:
.jpg)
Resetting Webstore Passwords:
Purchasers now have the ability to reset their own Webstore passwords, as long as they know their username and there is an email address associated to that username. This can be done by selecting "My Account/Login" and selecting the "Forgot Password" button:
.jpg)
.jpg)
.jpg)
.jpg)
See also: Paypal Setup, Transferring PayPal Funds
Copyright © 2010-2015 BoosterFinance™